Log in to WordPress Admin #
Once you log in to WordPress Dashboard
Go to the One Loop Studio menu as shown in image below
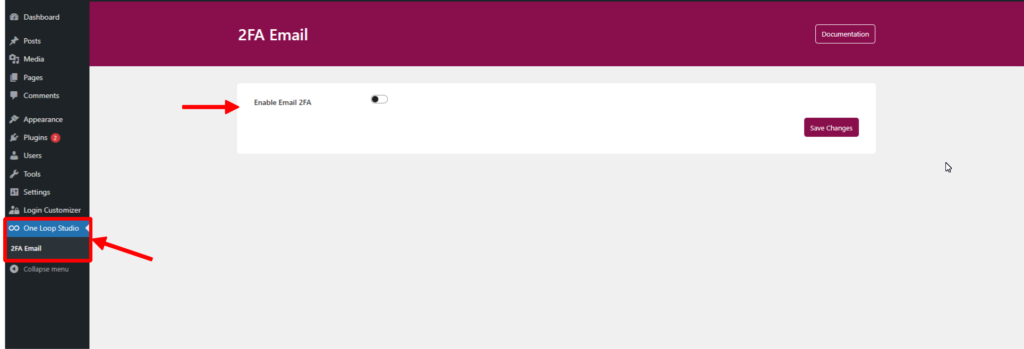
Enable Email 2FA #
Then you need to Enable Email 2FA
By enabling Email 2FA, you are ready to add an extra layer of security.
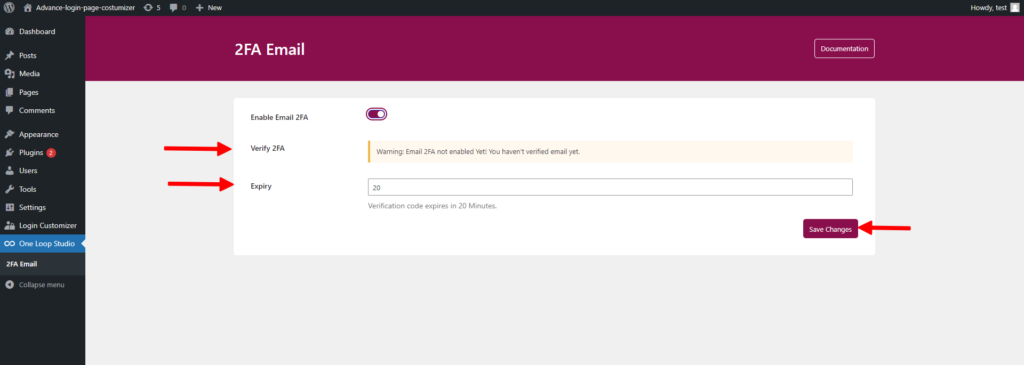
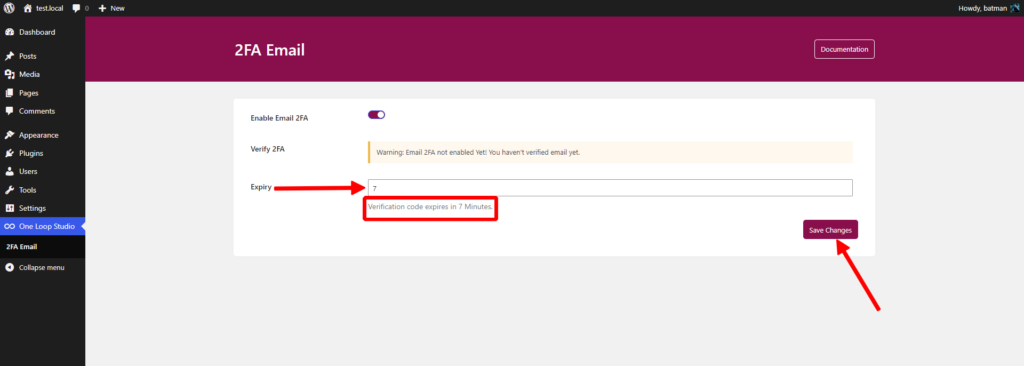
Customize Authentication Code Expiry Time #
You will also see an option to customize the expiry time for the Authentication Code. This defines how long the generated Authentication Code remains valid before it expires.
After adjusting the expiry time, click Save Changes to apply your new settings.
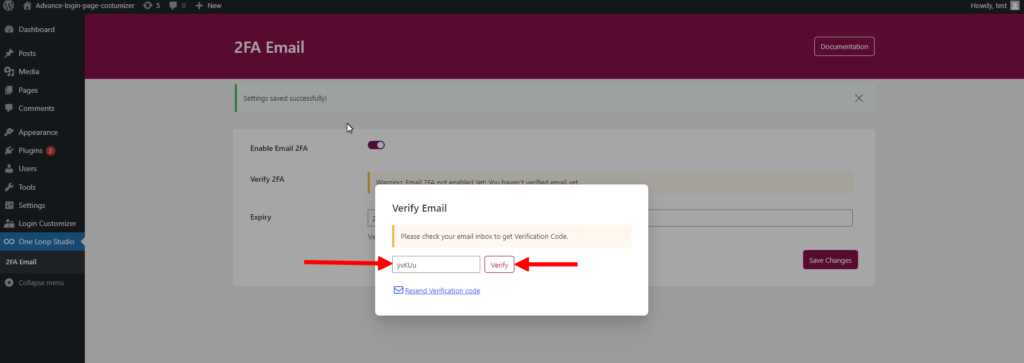
Verify received Authentication Code #
This step ensures that the email is being received correctly. A popup will appear, as shown below, prompting you to enter the Authentication Code sent to your email.
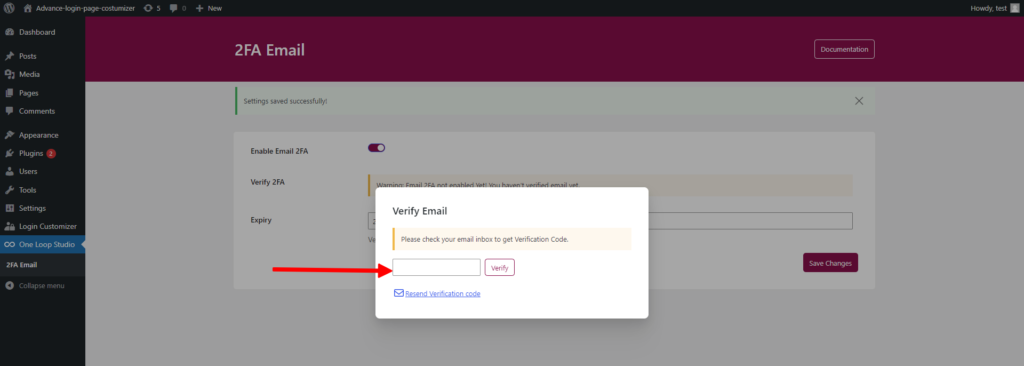
Receive the Authentication Code via Email #
You will receive an Authentication Code in the email.
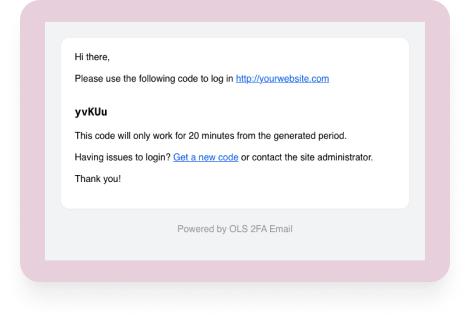
Enter the received an Authentication Code via email and hit the verify button
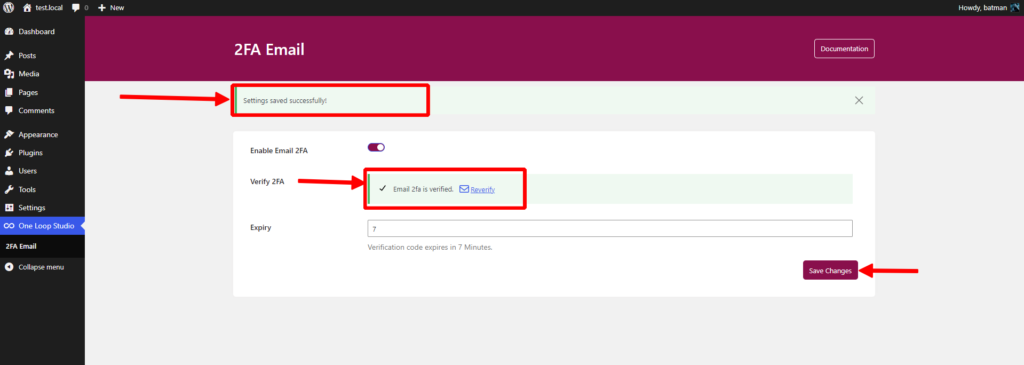
Confirmation of Settings #
Once the Authentication Code is verified, the confirmation message will appear, indicating that your settings have been successfully applied and Email 2FA is now active.
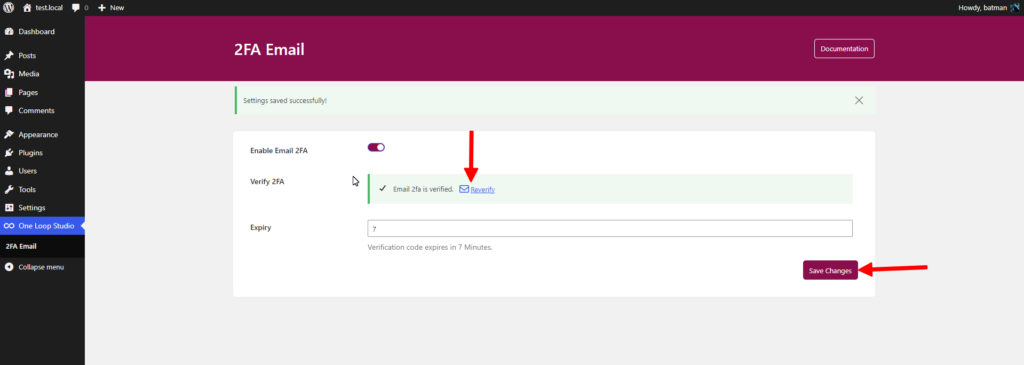
Reverify 2FA(Optional) #
If needed, you can Reverify the authentication by requesting a new code. A fresh authentication code will be sent to your email.
Ready to Use 2FA Authentication in the Frontend #
Once OLS 2FA is successfully activated, you’re ready to use it on the frontend for logging in to your WordPress site securely.


